Payout (Full) Flow
The Payout (Full) flow enables a user to:
- View their current USD or convertible token balance
- Add and select a payout payment method
- View the expected timeline and fee their payout will be assessed
- Create a payout request
- View and manage pending payout requests

When a user opens this page, they can view their current USD or convertible token balance. They see a payment method selected for them (and have the ability to set a default payout payment method to be pre-selected for all future payout requests). They can expand the drop down to view other payout-supported payment methods or to add a new one. Below this, they can enter the amount they wish to cashout. On the button at the bottom, they will see the fee amount removed and the amount they can anticipate to be transferred to their payment method. Upon clicking the button, the payout request will be created and will begin going through the Payout Rules Engine.

Upon returning to the Payout (Full) widget, users will be able to view and manage any payouts that are currently in a pending state.
note
This flow begins with a check for a signed TOS. If one has not been signed, a TOS screen appears for a user to accept before proceeding with the flow. After TOS, users will also need to complete either KYC (and have a KYC state of ACCEPT) or Tax Info Collection (and have a pii_level of BASIC) to land on the Payout (Full) screen.
Requirements
| Requirement | Description |
|---|---|
ID of the <div /> element |
Your named <div /> in which the payment selection flow will be rendered |
| Redirect URL | URL that initiates the flow |
Supported flowConfig Options
| Keys (all optional) | Values | Description |
|---|---|---|
| hideExitButtons | boolean (default: false) | Hides 'X' button where user can close out the UI. |
| verificationLevel | "basic_pii" | If the user has not completed KYC, this flow will appear before payout. This allows bypassing full 'KYC' when set to "basic_pii". Default (key is not included, or empty string) is to run the user through the full KYC flow. |
| hideWalletBalance | boolean (default: false) | Hides the wallet balance from the top of the screen. |
| fixedAmount | string or int representing the amount to the penny (i.e. '1000' for $10) | Allows you to pass in the payout value to the transaction (disabling modification by the user). |
| currency | currency code (string, defaults to 'USD') | Sets the currency for the payout. Use your virtual currency code to allow users to payout from their convertible token earnings. |
| postOAuthURLOverride | url (string) | Only relevant to native applications where a user needs to be redirected to a browser for OAuth validation (i.e. Paypal). To allow the native application to be opened after validation (through a universal link, or custom url scheme) you can supply the url string here. For this to work though, we have to add the url domain pattern to an allowed list of redirect patterns (please see your account rep to set this up). |
Widget Flow Implementation
Use the following steps to open and customize a payout page in the widget:
- Copy the following code sample.
window.Tilia.execute({
    rootId: "<YOUR-ELEMENT-ID>"
    flow: "payout-full",
    redirect: "<WIDGET-REDIRECT-URL>",
    onComplete: handleComplete,
    onError: handleError,
    theme: {
      backgroundColor: "#323232",
      primaryColor: "#47CC00"
    }
    flowConfig: { // optional, see section above for supported values
      fixedAmount: "",
      currency: "<YOUR-VIRTUAL-CURRENCY-CODE>",
      hideWalletBalance: false,
    }
});-
Replace the placeholder values (
, ) with the values from the Requirements section. - (Optional) In the theme object, customize the appearance of the widget, or customize the flowConfig .
Events
The Payout (Full) flow fires the following events.
OnComplete
Fired when a user clicks the Close button after completing a payout request:
{
  source: "tilia",
  event: "tilia.payout-full.complete",
  state: "complete",
  trigger: "header-close-button",
  payout_status_id: "<PAYOUT_STATUS_ID>"
}
Fired when a user clicks the "X" button in the header
{
  source: "tilia",
  event: "tilia.payout-full.complete",
  state: "cancel",
  trigger: "header-close-button",
  payout_status_id: "<PAYOUT_STATUS_ID>"
}
Testing bank accounts on staging environment
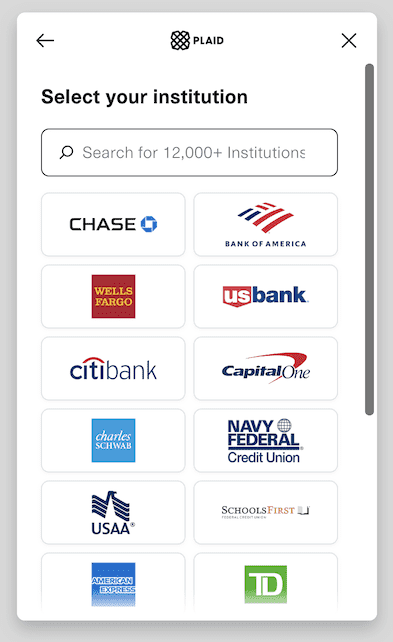
Our method for allowing users to add their bank account details is through Plaid, a system that integrates with the open authentication (OAuth) system of larger banking institutions.
When testing in our staging environment, you don't need to add a real bank account; instead, you can use Plaid's OAuth testing setup.
To do so, select 'Add payment method' from the UI and then the 'Bank' option. In the 'Select your institution' screen, choose one of the first few options (e.g., Chase, BofA, Wells). Plaid will walk you through a simulated sign-in flow, which doesn't require real-world login information.

